IntelliJ is an IDE (Integrated Development Environment). It’s like a text editor (like Atom or Sublime) but it’s full of extra features which make developing large programs much easier.
Prerequisites
- Java 10, from Lab 1 Setup.
- You have successfully created your local repo for the class on your own machine. This is the
su18-USERNAMErepository you made in Lab 1. - You have pulled from the skeleton, and you have a
lab4directory in the same directory as your lab assignment folders.
Be mentally prepared to use a real world software development package. It will seem very complicated for a while, but we’ll lead you down the narrow path to success. Ask for help if you are stuck! It can be very hard to guess the right thing to do in IntelliJ.
Install IntelliJ
If you’re working on the lab computers, skip these steps. Otherwise, do the following:
- Install the Community Edition of IntelliJ from the JetBrains website.
- Download the appropriate version of IntelliJ for your operating system.
- Run the install file and follow the prompts to install IntelliJ onto your computer. Choose all the default settings.
While you’re waiting for IntelliJ to install (or, in the case of the lab computers, to start up), work through the Discussion: Mystery problem from lab 4 with your your partner.
Install the CS 61B Plugin
Begin the setup process by starting up IntelliJ. If you’re on one of the lab computers, use the command /share/instsww/bin/idea.sh in a terminal window to start IntelliJ.
Then follow the steps below.
-
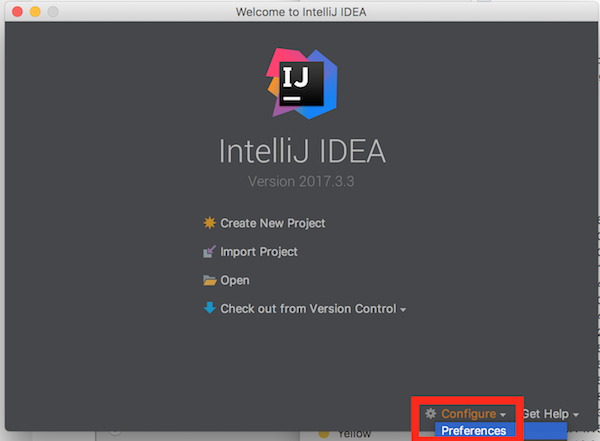
In the Welcome window, click the Configure -> Plugin button on the bottom right of the window.
-
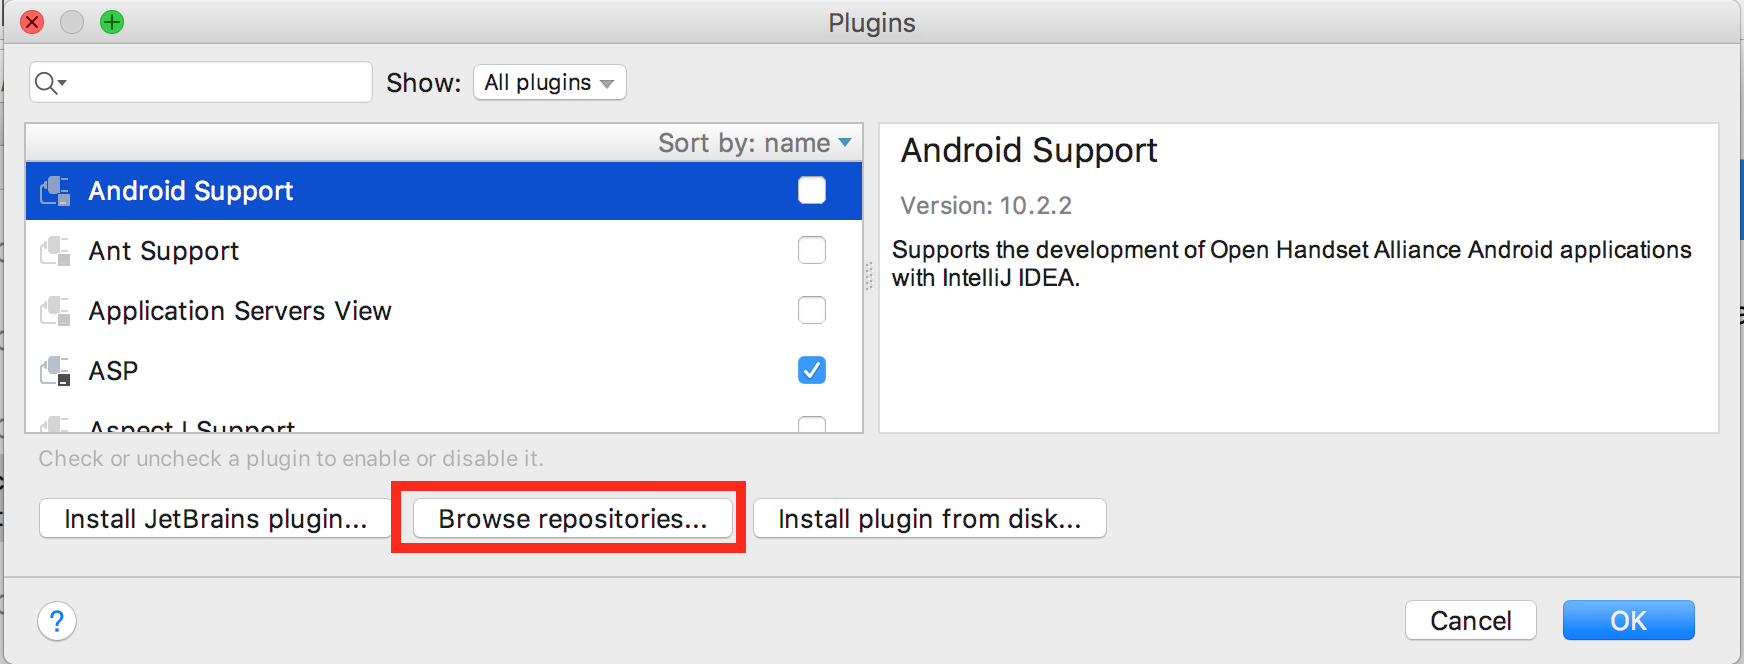
Click the button labeled Browse Repositories… on the bottom.
-
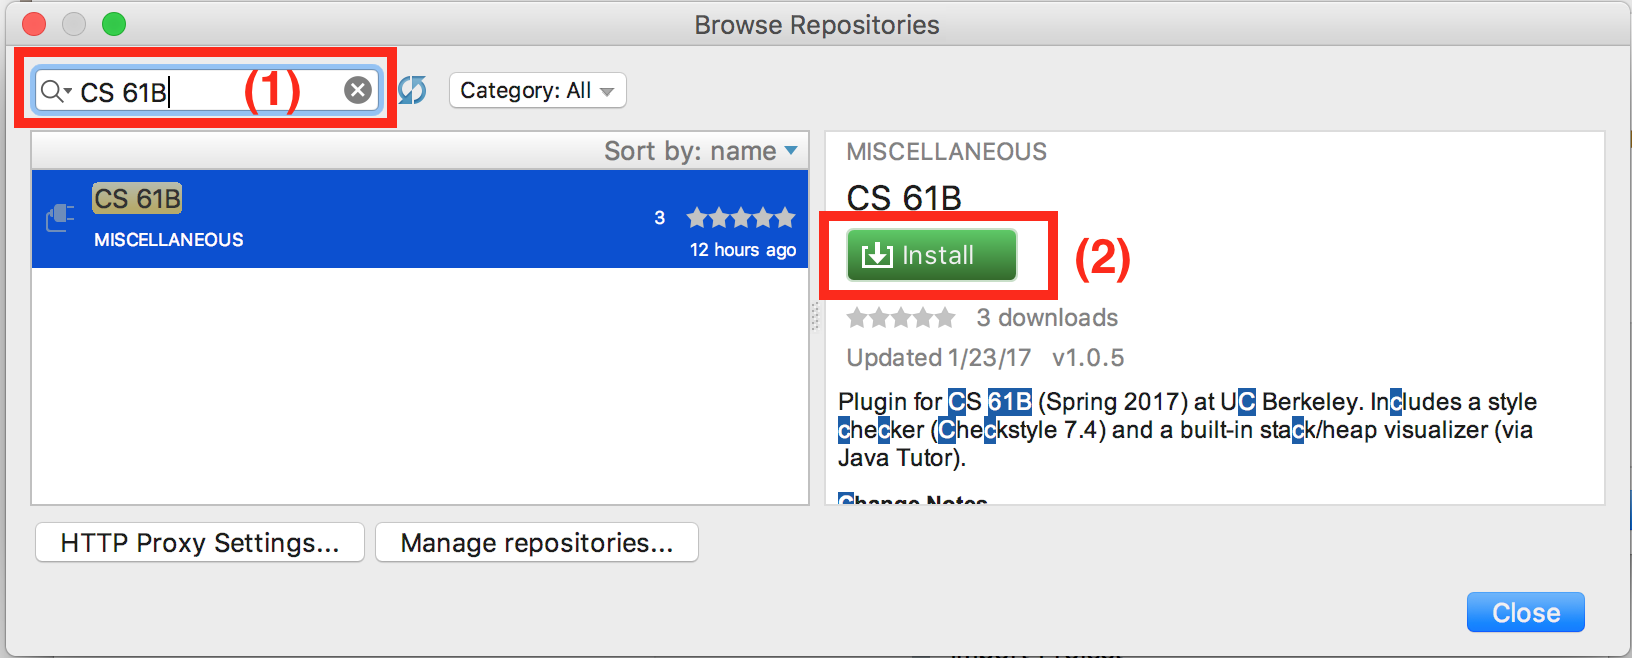
In the window that appears, search for “CS 61B”. Install the CS 61B plugin.
-
After installation, Restart IntelliJ IDEA to finalize the installation.
For more information on using the plugin, read the plugin guide. You don’t need to read this now.
Project Setup
In order to run your files in this special environment where we can work our IDE magic, we need to import our files into a project, similar to how you might import images or clips into a project for a program like iMovie or Windows Movie Maker. Fortunately, this is a fairly painless process.
Every new assignment needs to be imported into IntelliJ.
Begin the setup process by starting up IntelliJ. If you’re on one of the lab computers, use the command /share/instsww/bin/idea.sh in a terminal window to start IntelliJ. Then follow the steps below.
-
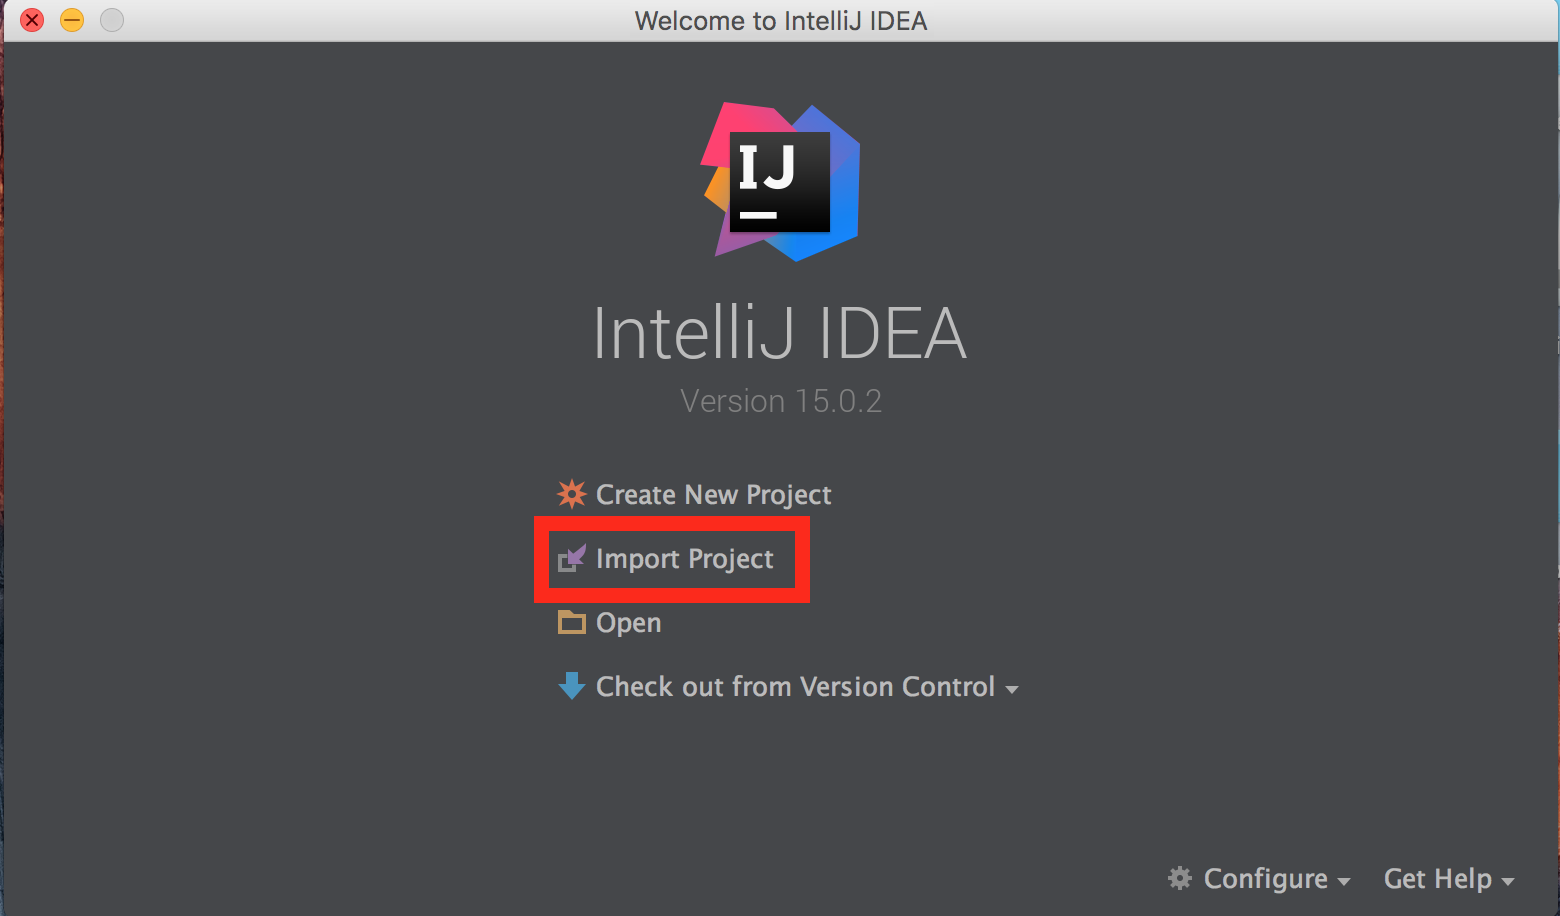
Upon opening IntelliJ, Import Project.
-
Find and choose your
lab4directory, then press the OK button. From here on out, you should be able to simply select next for every screen but to be safe, more screenshots follow.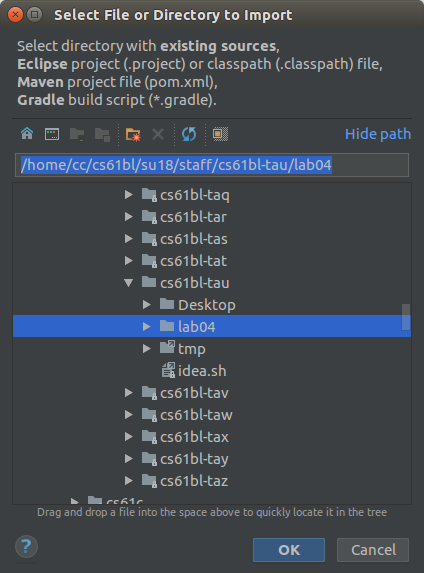
-
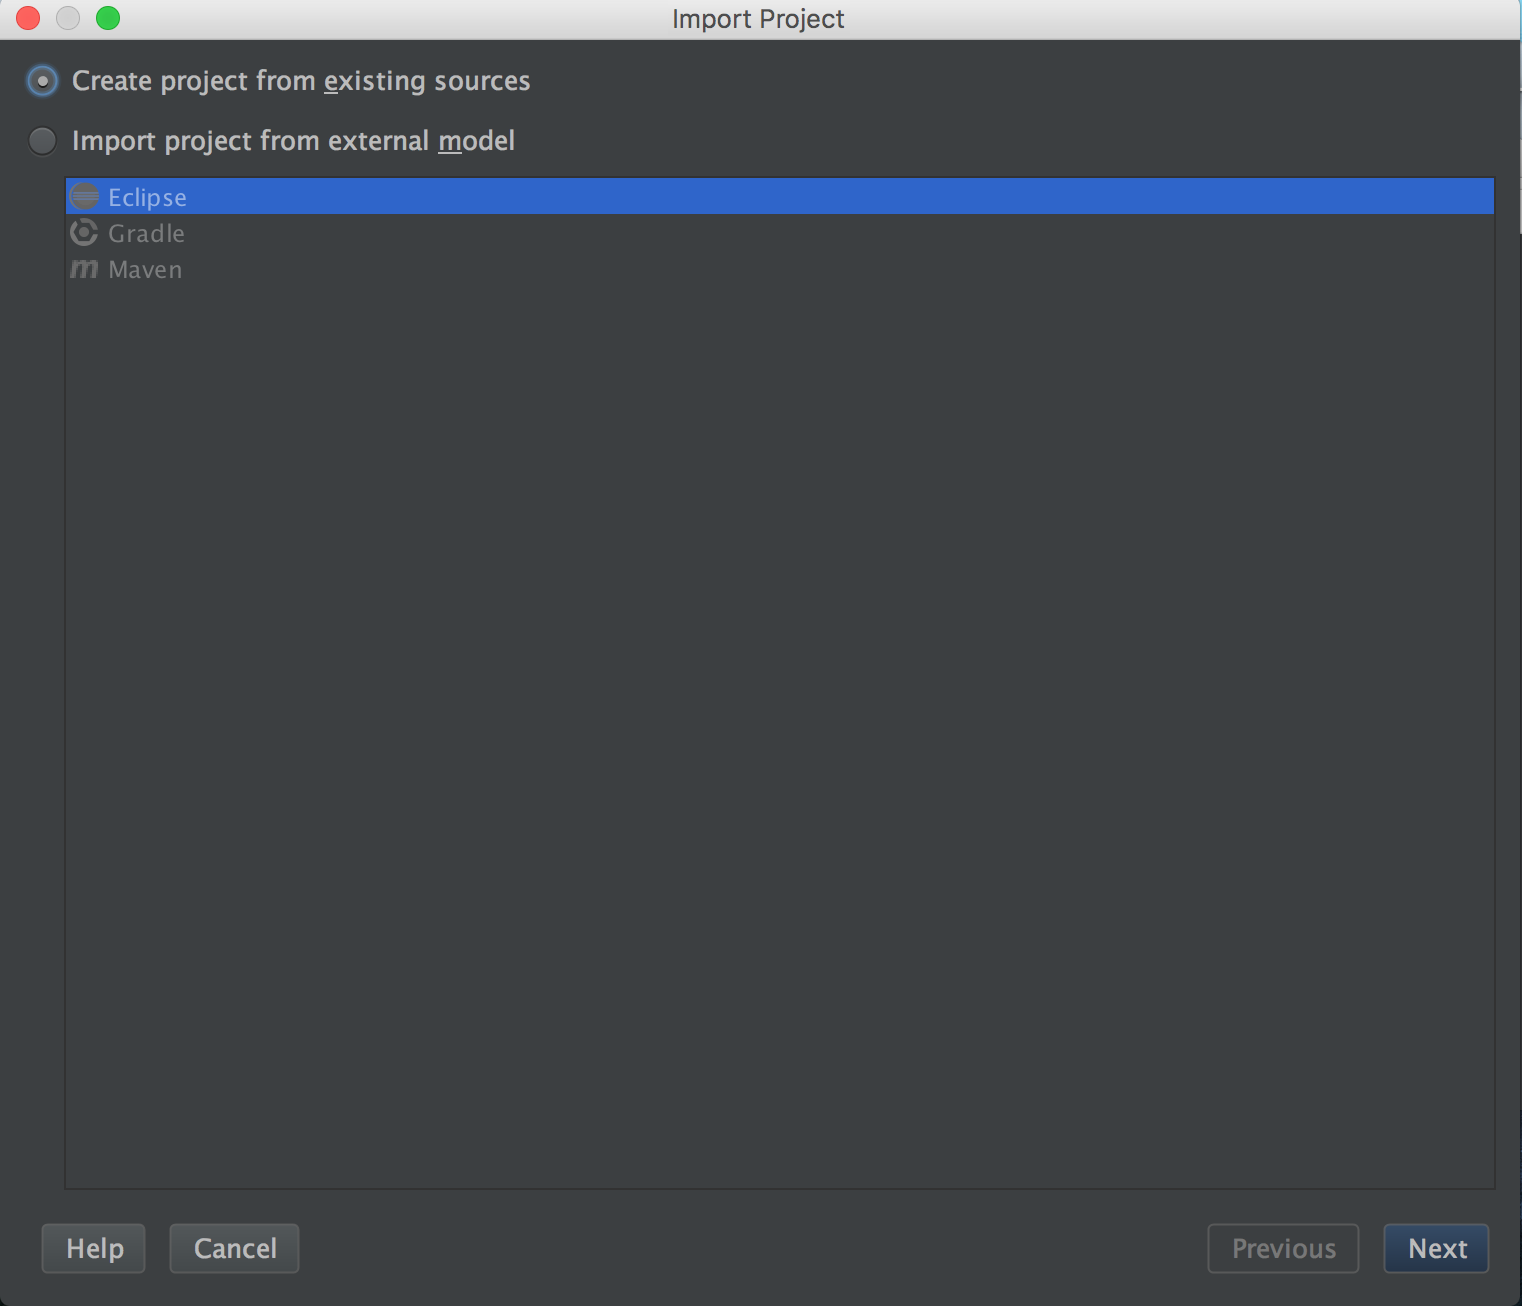
Make sure Create project from existing sources is selected and press next. You shouldn’t have to change anything at this step.
-
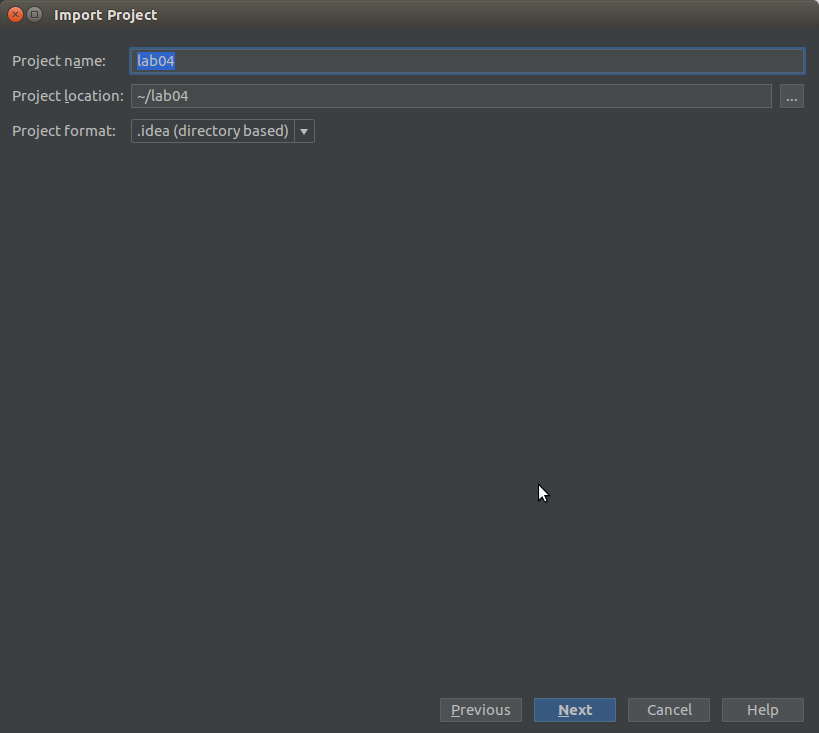
Leave these fields untouched and press next.
-
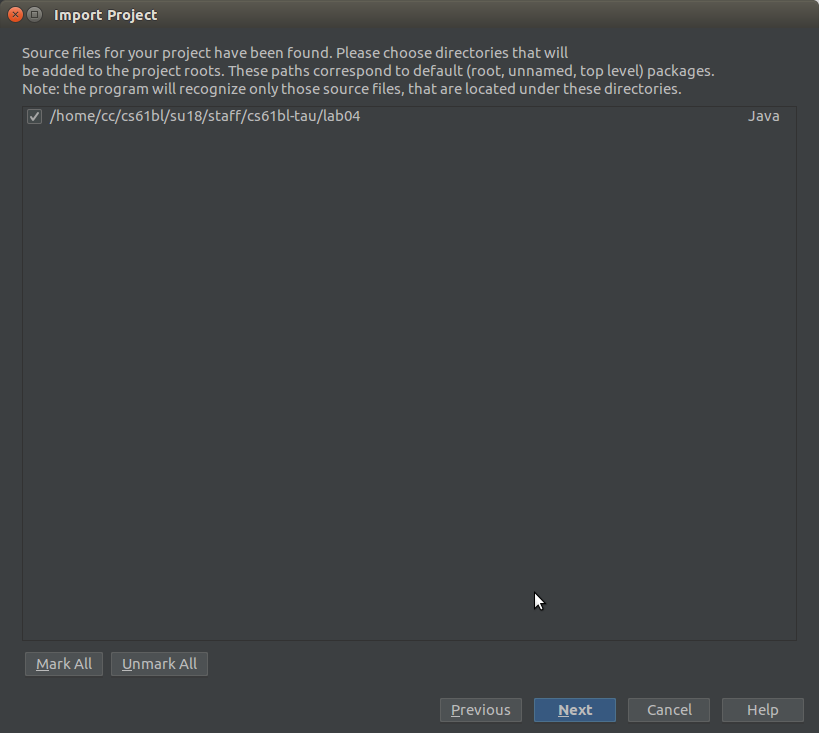
Do nothing here and press next. For context, IntelliJ is automagically detecting what your Java files are and self-configuring itself to edit and run them.
-
You may not actually see this next window pop up. If it does, click Next. If it doesn’t, that’s fine.
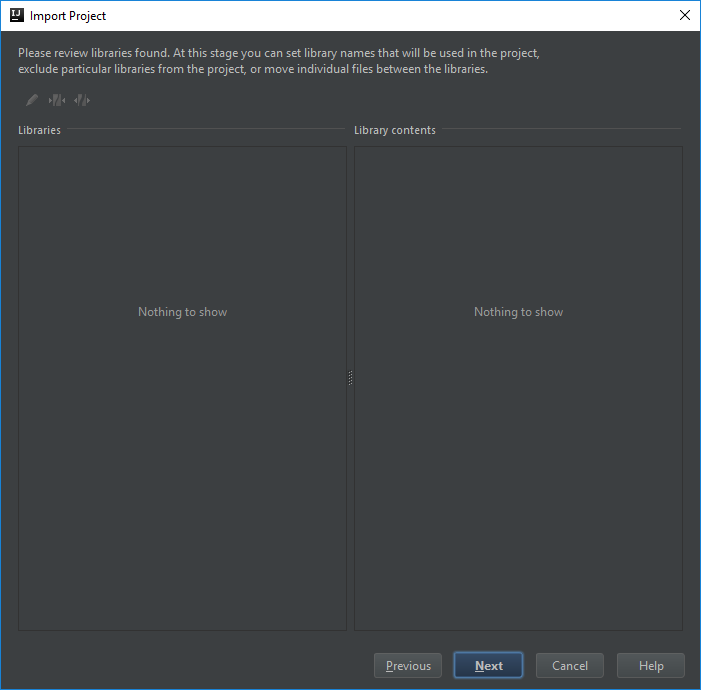
-
You may not actually see this next window pop up. If it does, click Next. If it doesn’t, that’s fine.
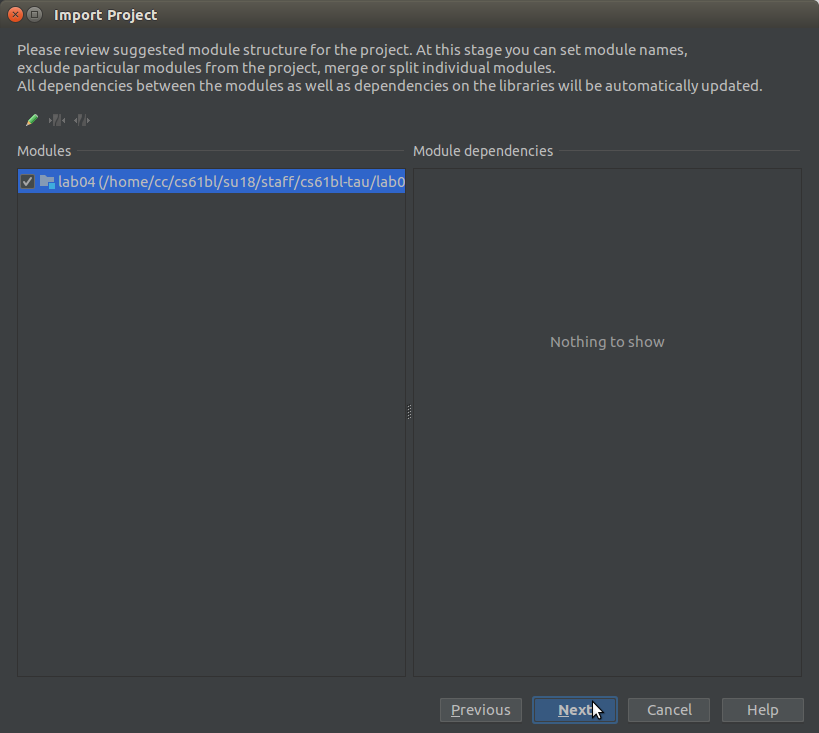
-
You may not actually see this next window pop up. If it does, and you see 10.0 on the left sidebar, you’re in the clear and can simply press Next then click finish on the final screen and voila, you’re ready to start working on the assignment!
-
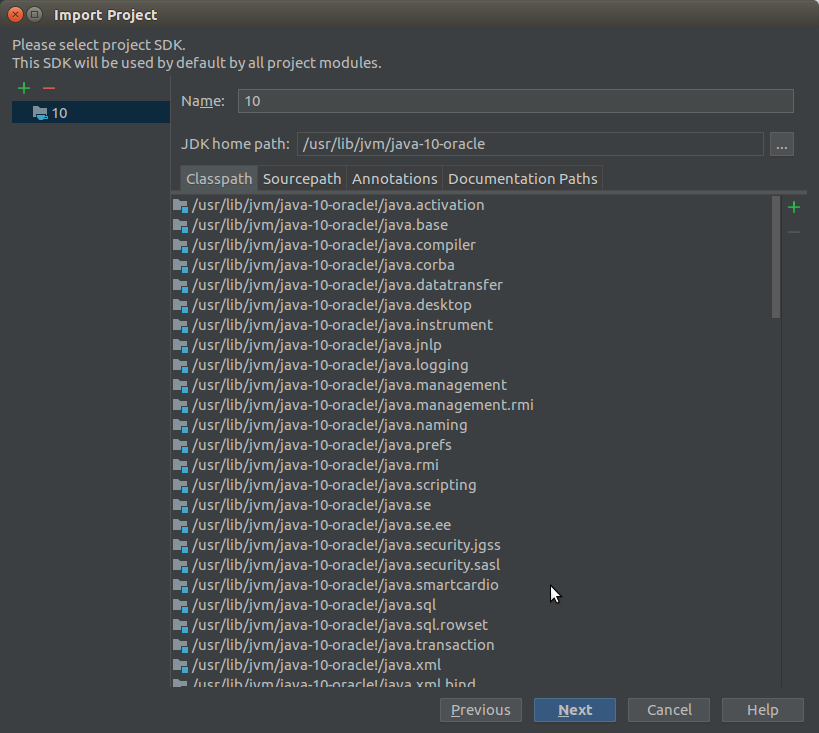
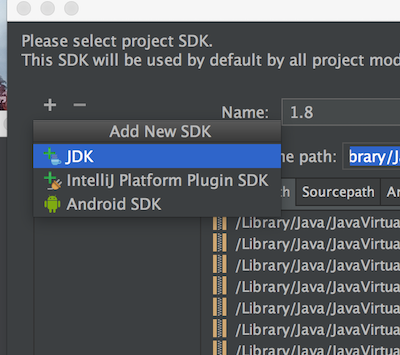
If you keep clicking next without paying attention and get to a point where you see a message that says No SDK specified, stop! If you do NOT see 10.0 (or whatever version of Java you have installed), click the plus in the upper left corner and click JDK from the drop-down menu.
Find where your JDK is saved, select it, and press the OK button. You can run
/usr/libexec/java_homeon your terminal to find out:$ /usr/libexec/java_home /Library/Java/JavaVirtualMachines/jdk-10.0.1.jdk/Contents/HomeIf you’re on Windows, your path may look like
C:\Program Files\Java\jdk10.0.1.If you’re on a lab computer, it should be at
/usr/lib/jvm/java-10-oracle/. Once this window closes and your screen looks like the last correct image above, press Next, then Finish, and you’re done!
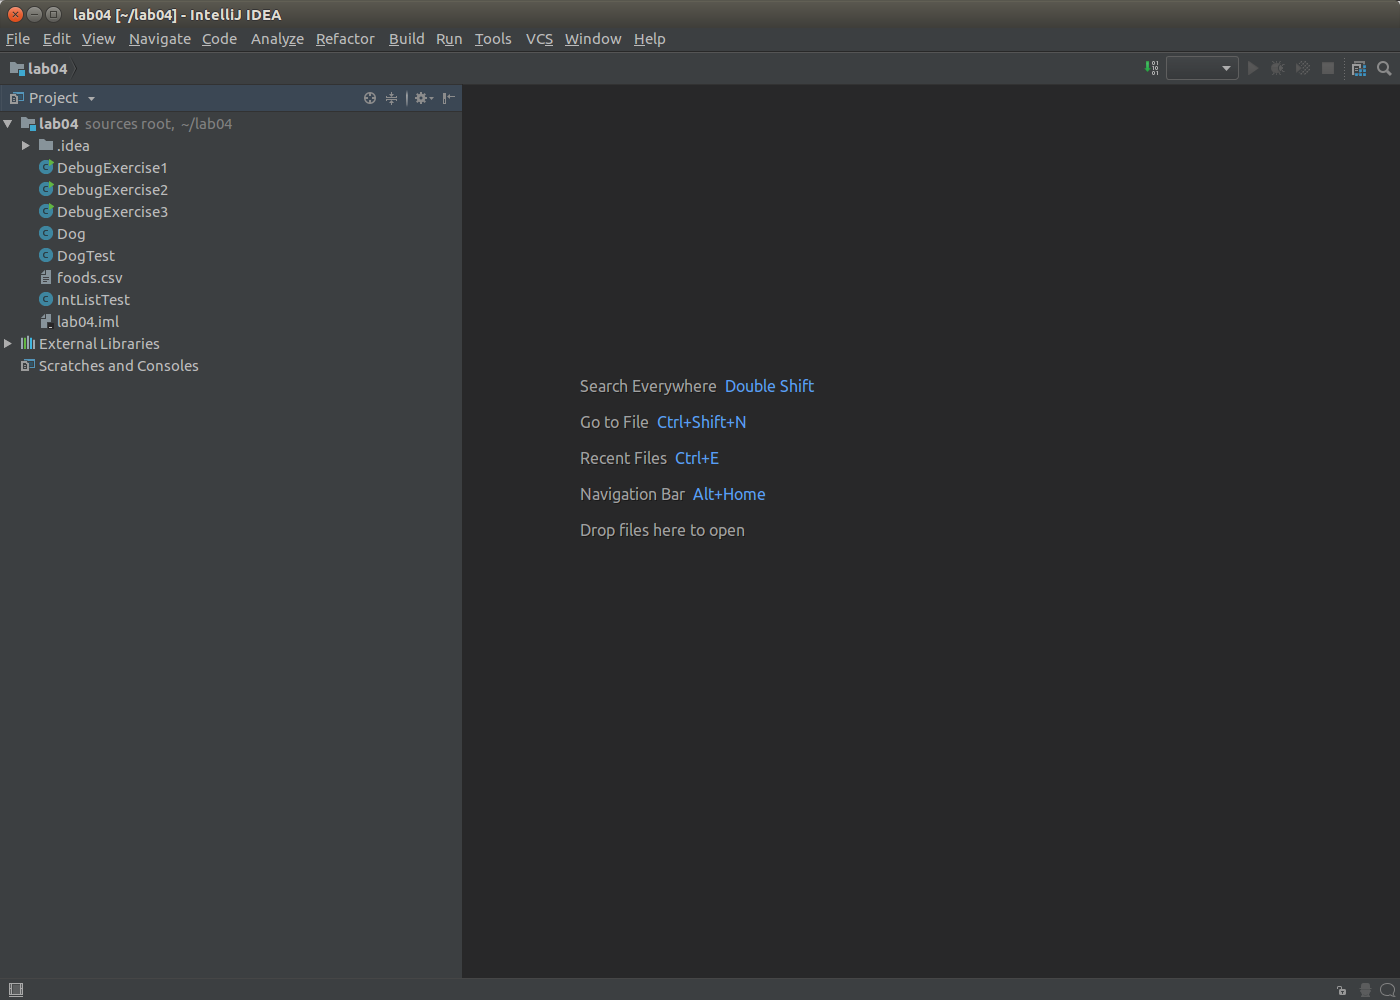
Once you’ve pressed finish, you should see something really similar to the following image. You may need to click the little triangle next to lab4 in the top left to get the source files (Dog.java and DogTest.java) for lab4 to show up. If you don’t see the sidebar, go to View -> Tool Windows -> Project.
These instructions apply for both initial setup and for future assignments. When you run git pull skeleton master to retrieve a new assignment and you notice that you have a new assignment directory, simply run through these steps again from 1 to 8. This will likely involve pressing next for all steps and, if IntelliJ asks you to overwrite various housekeeping files (such as .iml files) because they already exist, respond “Yes” or “Overwite” to those popup windows. This is so IntelliJ can automatically mark the new directories for your assignment to work with IntelliJ for you as opposed to you manually marking directories as source folders and/or modules.
Every new assignment needs to be imported into IntelliJ. Every single new lab and project needs to be imported into IntelliJ using this process. Yes, every single lab, and every single project needs to be imported the very first time.
Relax for a Bit
The first time you start up IntelliJ it’s going to spend some time indexing files. This may take a few minutes. There should be a little progress bar in the bottom right. Once it’s done, a sidebar will appear.
Continue working on the Discussion: Mystery question.
Setting Up Java Libraries
Remember the empty library-su18 folder? We are going to populate that folder with the Java libraries we need for this class.
- First, open up a terminal window and
cdinto your repository. -
Run
git submodule update --initYou should get output like this:
Submodule 'library-su18' (https://github.com/cs61bl/library-su18.git) registered for path 'library-su18' Cloning into '/home/kevin/cs61bl/su18-kevinlin1/library-su18'... Submodule path 'library-su18': checked out '83521d6f6b313145e1debdeab8b5f25c3bbf6854' -
Ta-da! You now have libraries!
$ ls library-su18/
javalib/
If Git is having trouble running the
submodulecommand and cloning thelibrary-su18repository, try running the following commands to make sure the remote repository URL is correctly defined.git config --file=.gitmodules submodule.library-su18.url https://github.com/cs61bl/library-su18.git git submodule sync git submodule update --init
Below is shown the directory structure of library-su18. Look inside the folder and make sure you see the six .jar files listed below. If you’re using your operating system’s file explorer the jar part might not show up in the filenames, and that’s OK.
   library-su18/
   └── javalib
       ├── algs4.jar
       ├── hamcrest-core-1.3.jar
       ├── jh61b.jar
       ├── junit-4.12.jar
       ├── stdlib-package.jar
       └── stdlib.jar
Importing Libraries
Double check on DogTest.java. You should see that some of the words in the file are red, specifically Test and assertEquals. If you mouse over them, you’ll see a message along the lines of “cannot resolve symbol”. The trouble is that we haven’t told IntelliJ where to find the CS 61B libraries we just pulled.
-
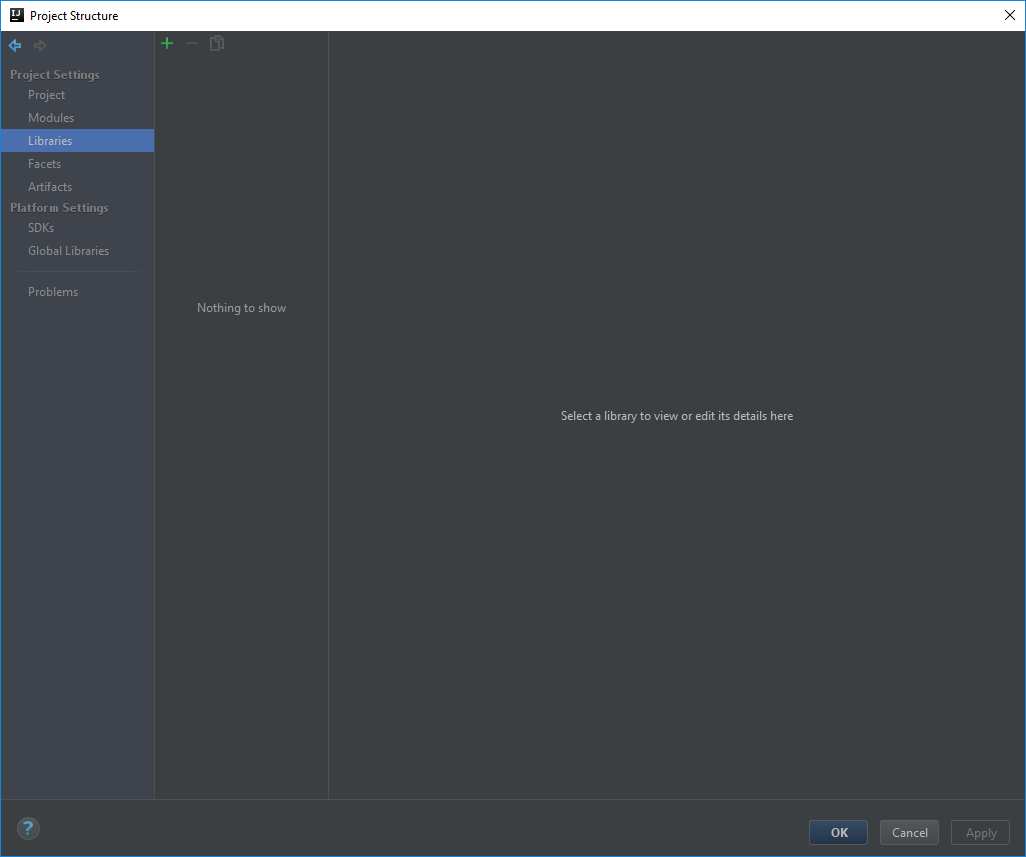
Click File -> Project Structure in the top left of IntelliJ. A window should pop up, and you should click Libraries on the left panel of this window. When you’ve done so, it’ll look as shown below:
-
Click the green plus in the top left of this window and pick Java from among the given choices. This will pop up a window. Click on the
javalibfolder (which is inlibrary-su18) and press OK. If you get a message that says something like, “IDEA cannot determine what kind of files the chosen items contain”, then you probably selected the wrong folder. Make sure you’ve selected thejavalibfolder and not thelibrary-su18folder.Press OK a few times, and you’ll find yourself looking at
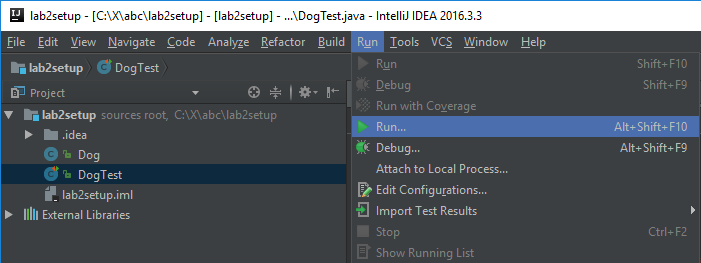
DogTest.javaagain. This time, the red text should be gone. If it is not, click File -> Project Structure -> Problems -> Fix -> Add to Dependencies -> OK.Try running the code by clicking Run -> Run, as shown below.
-
This will probably pop up a very small dialog window like the one shown. Basically IntelliJ is saying that it isn’t quite sure what you mean by running the program and is giving you two choices:
0.is to edit the configuration before running the program (which we won’t do).2.is to run theDogTestclass, which is what we want. Note that some IntelliJ installations may come installed with an Android JUnit, which you can tell apart by the small green Android icon in place of the usual red-green left-right JUnit icon. Make sure to choose the correct one based on the icon shown in the screenshot below.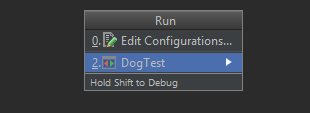
-
Click on
DogTestand a green bar should appear with the message “All 2 tests passed.” as shown below.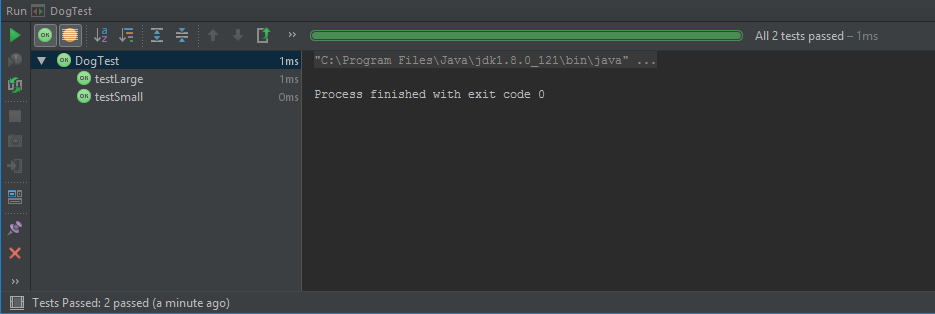
You’ll notice after running your code that the green play and green bug icons in the upper right are now green; this is because IntelliJ remembered what you meant by “Run” for this project and you can now click this button to run your program. You’ll learn more about this over time as we use more advanced features of IntelliJ.
Optional: Embedded Terminal
IntelliJ has the cool feature that you can have a working terminal in the workspace so you don’t have to constantly switch between having IntelliJ and your terminal, if that becomes necessary for whatever reason.
For Mac users, you should be able to skip this setup section. Windows users will likely have to put in a little leg work. This setup assumes you are a Windows user and you have Git Bash installed.
-
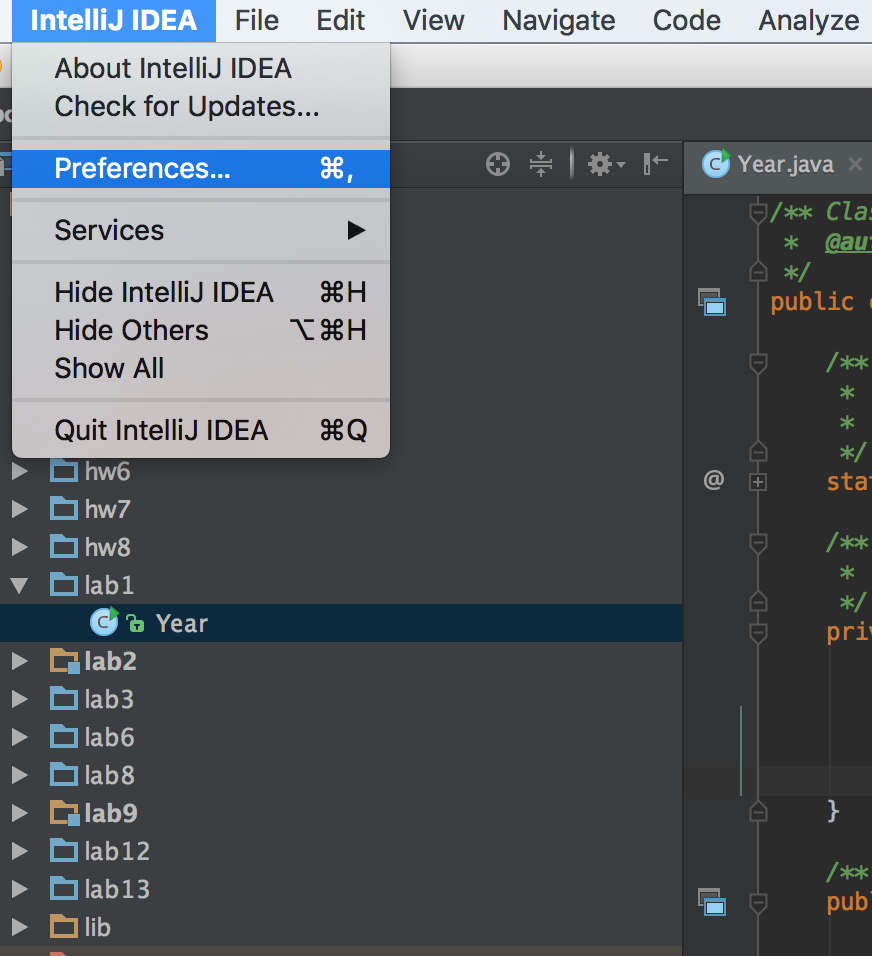
First, find the preferences/settings tab and select it. (Or use Ctrl+Alt+S.)
-
Type in “terminal” in the search bar. Once there, type in
"C:\Program Files (x86)\Git\bin\sh.exe" --login -iinto the Shell Path field. Click OK.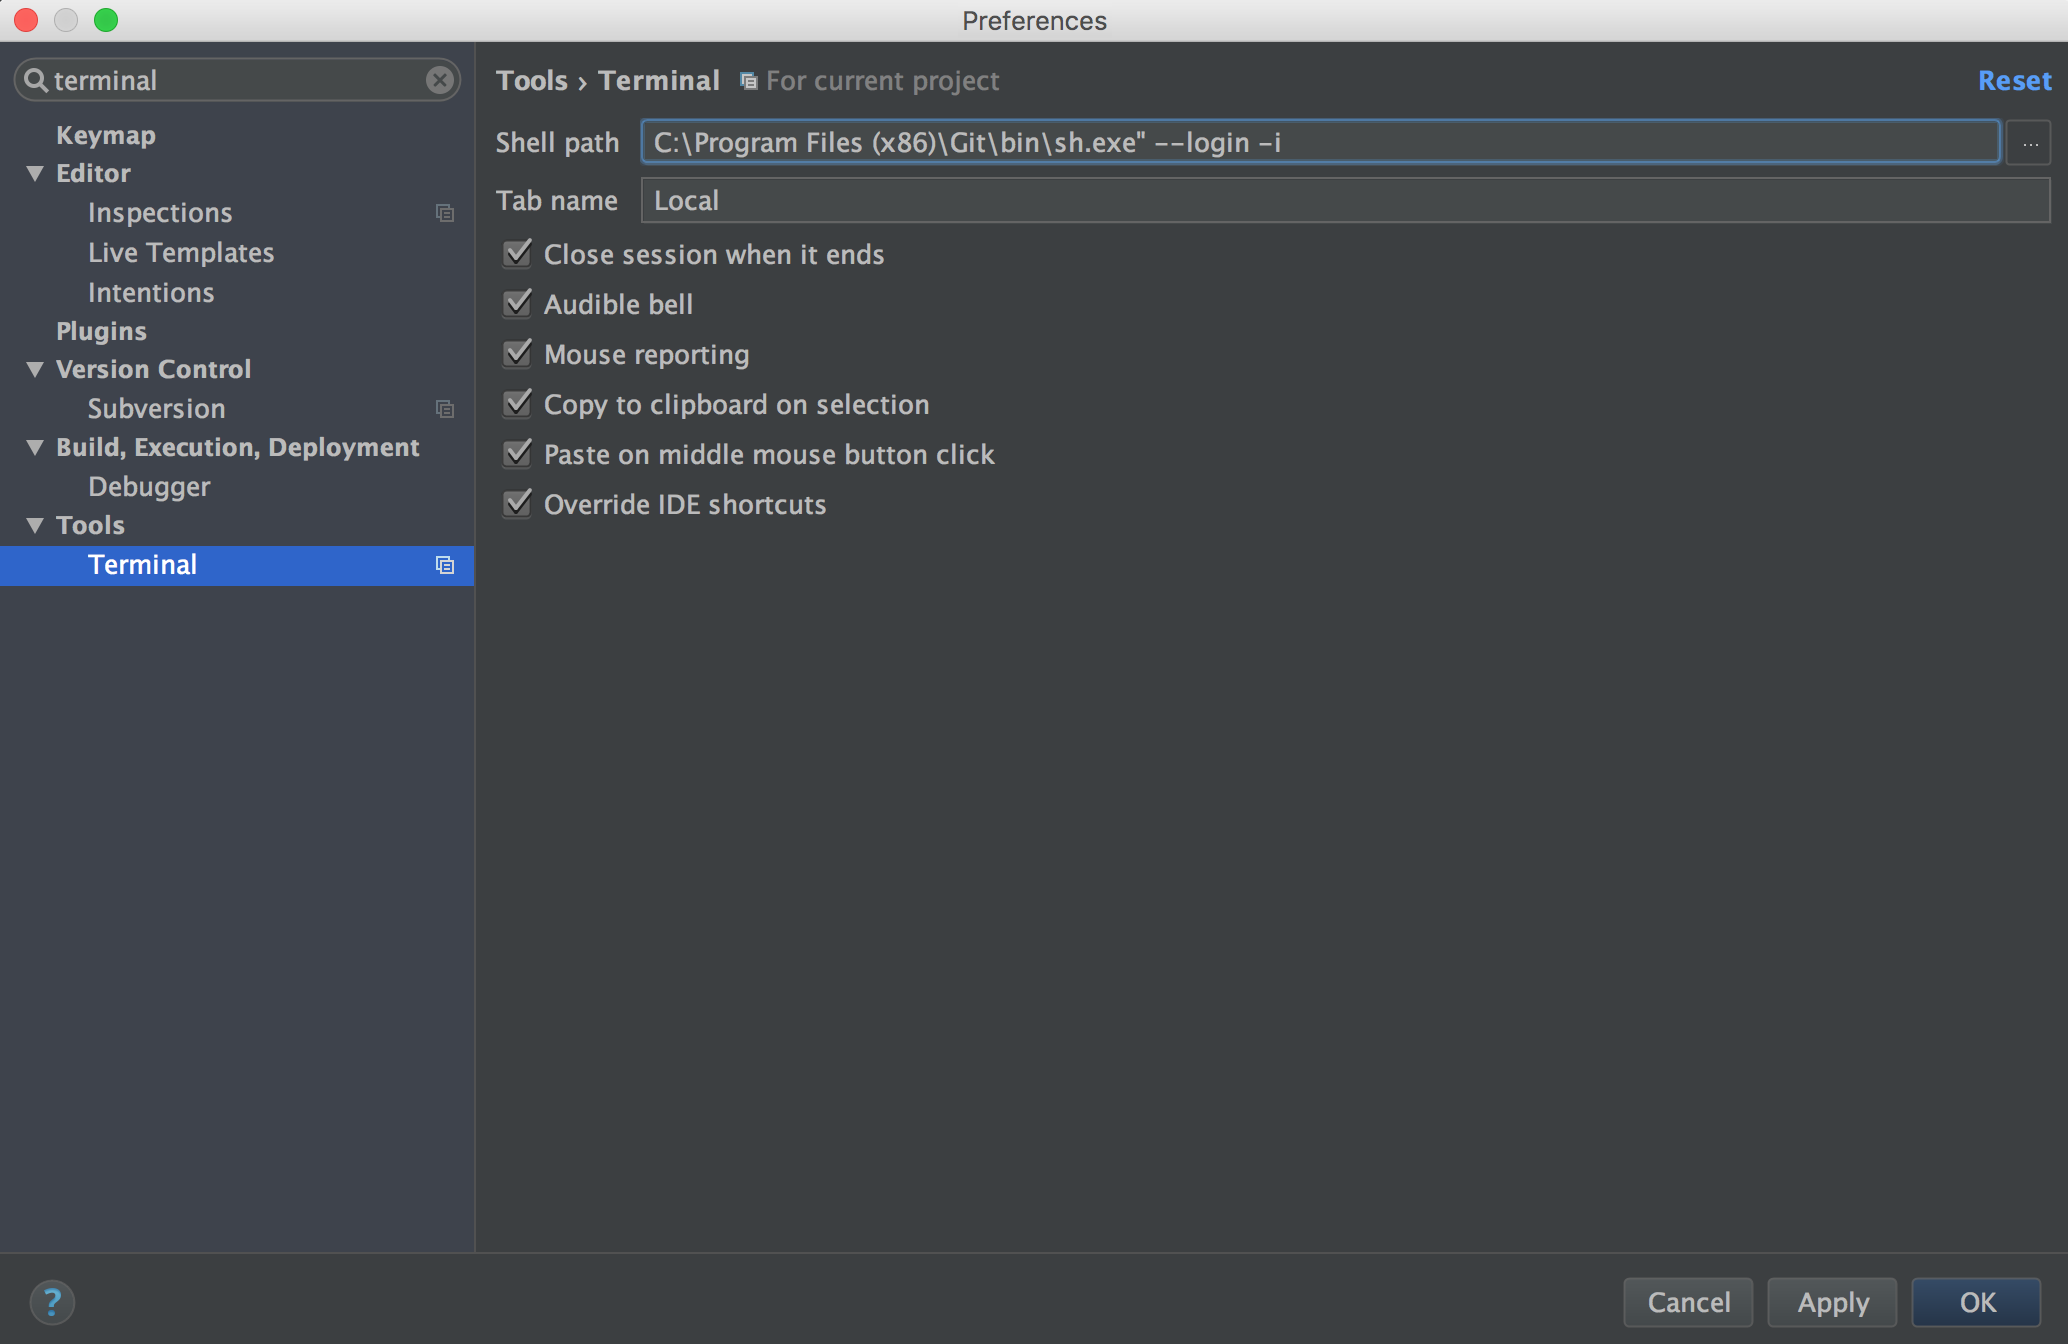
-
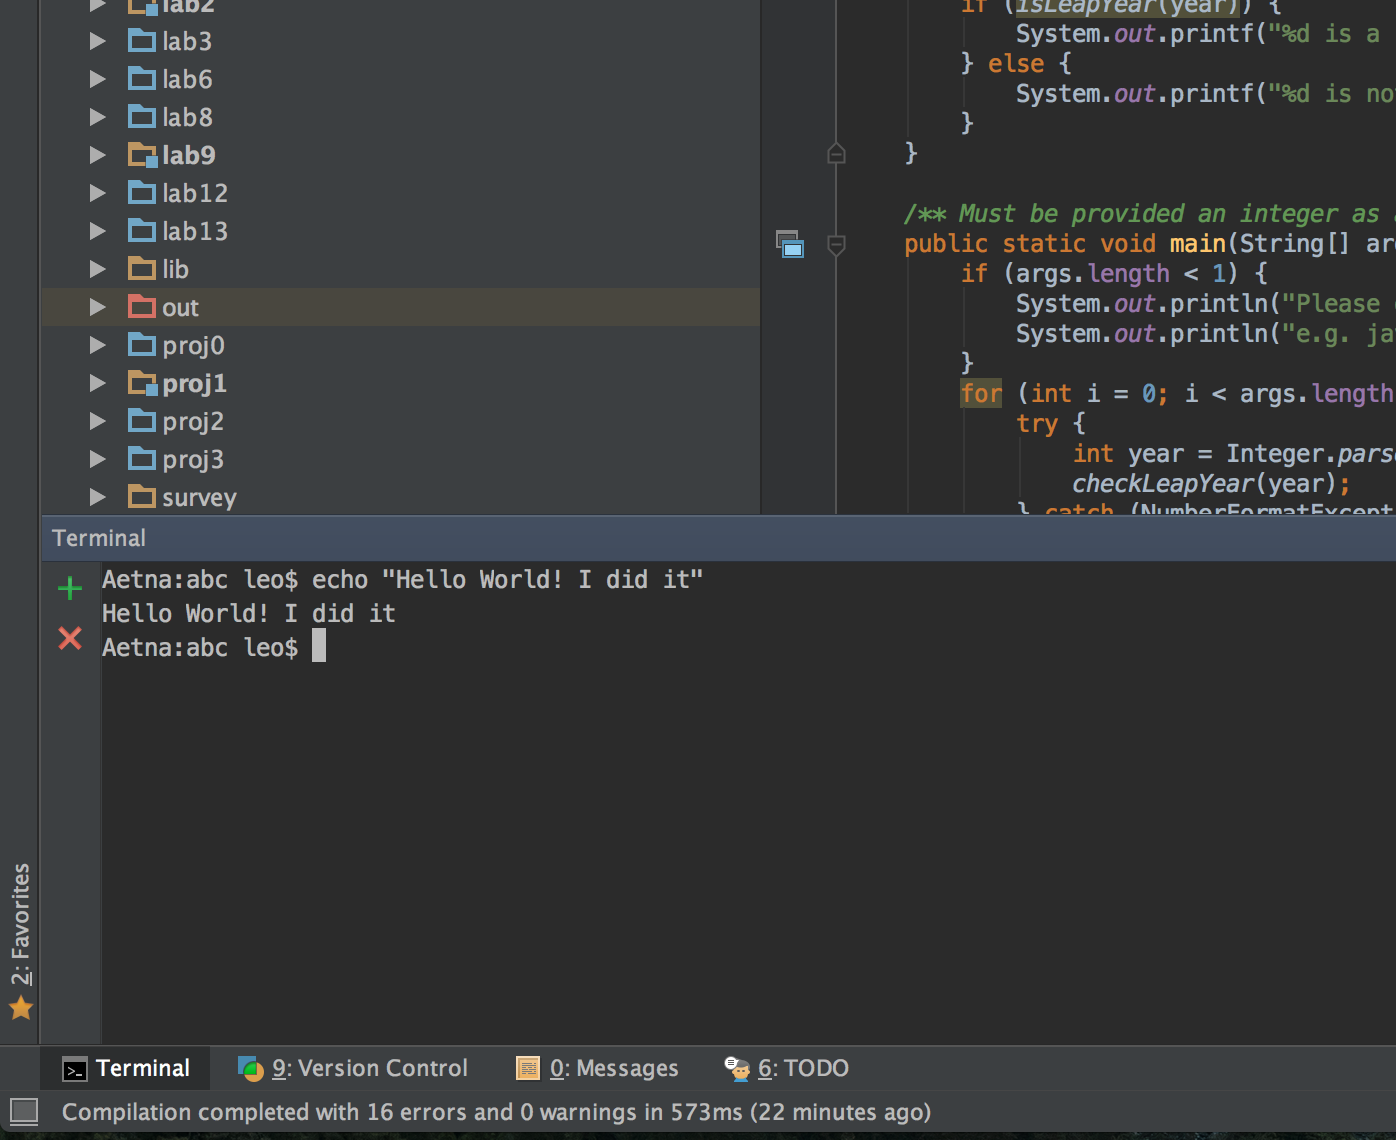
To test if you’ve properly set this up, hover over the little box in the bottom left corner and select terminal; the bottom third of your screen should now be a terminal, the equivalent of having git bash right there.
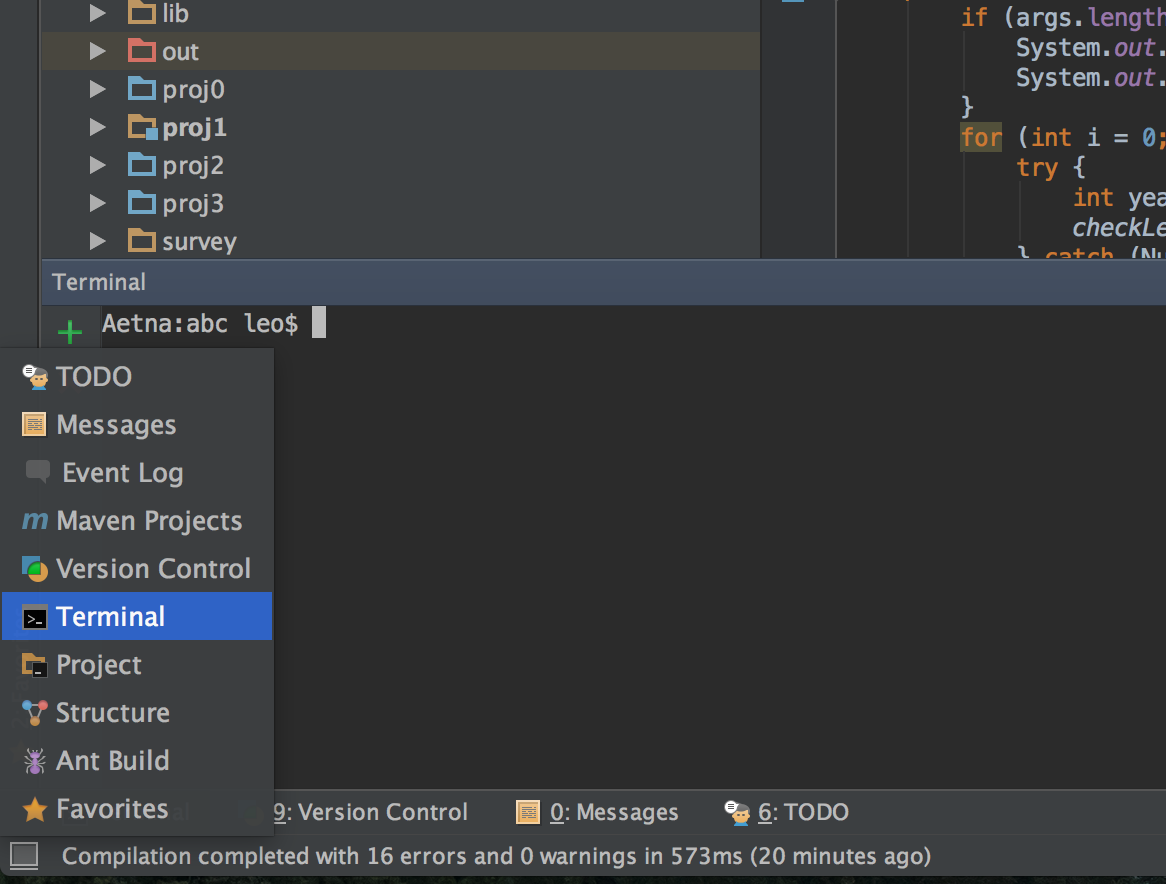
-
Try typing something in! If you’re able to run basic commands like
lsorcdorecho 'Hello world'you’ve done it!