A video walkthrough for this guide is available. The guide has been reorganized a bit and will be in a different order from the video, but all the steps are the same.
Install Java
Download the (Oracle) Java 12 JDK.
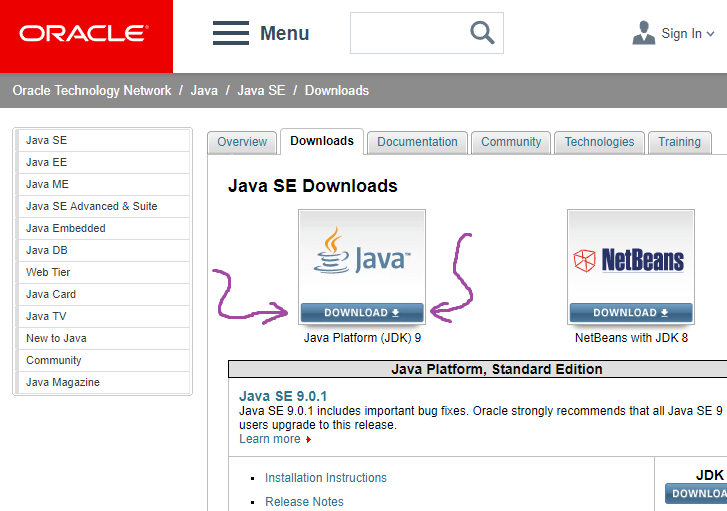
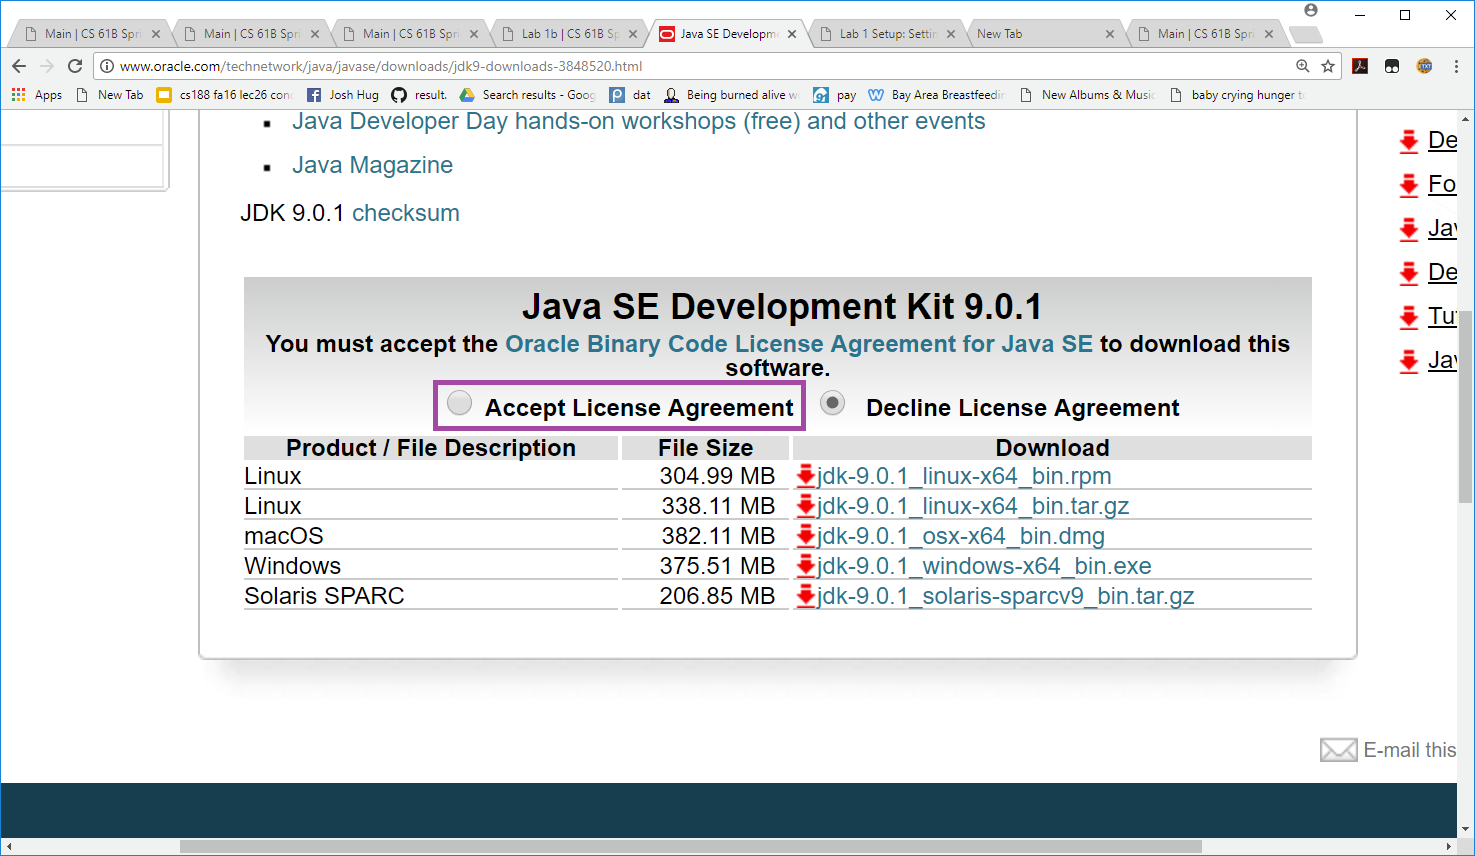
On the following page, find the download section entitled “Java SE Development Kit 12.0.1” (or a higher version number, if this is out of date) and agree to the license. Then proceed to download the binary file for your operating system.
Run the install file and follow the prompts to install Java onto your computer. It’s OK to select all of the default options. This may take several minutes, and it may seem to pause for a long time before completing. It can get stuck at the last 5% for at least a few minutes before completing.
Install Git and Git Bash
Before you start, you should have installed Java as described above.
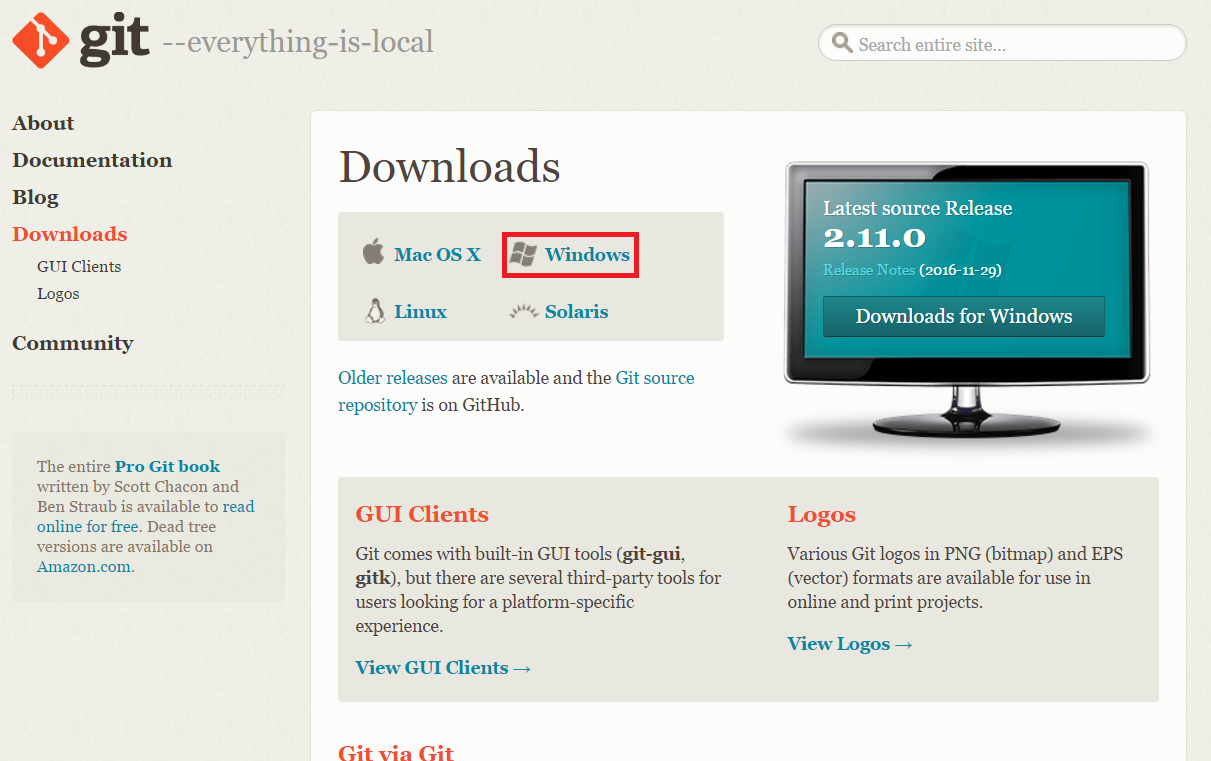
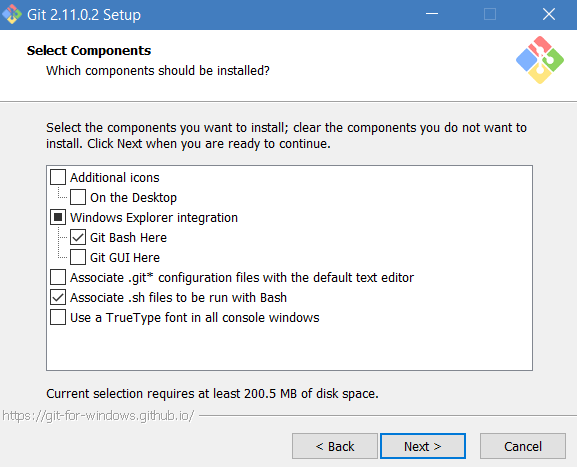
Download the Git for Windows installer. When you run the installer, you’ll be faced with many options. Unlike everything else, we do not recommend the default options. Instead, you should choose the options listed below.
- Checking
Windows Explorer integrationwill let you do git things upon right-clicking a file or folder, more specifically, run Git Bash and the Git GUI respectively. This is not required, but might be handy.
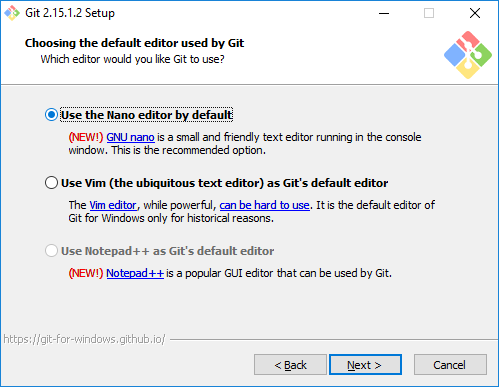
- Next we’ll select a default Git Bash. Unless you’ve used vim before, we strongly recommend using nano instead.
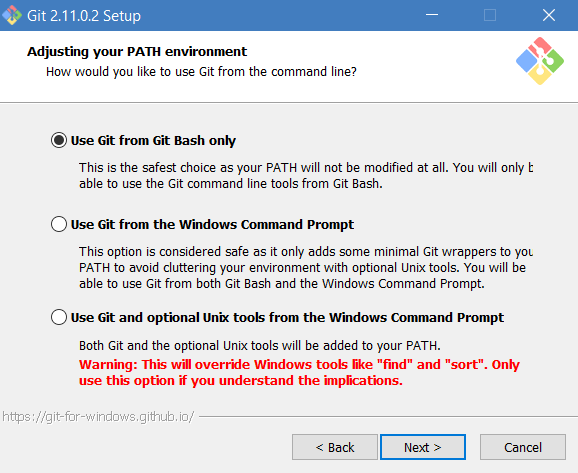
- Git Bash is a bash shell with built-in git support and lets you use some MinGW/Linux tools. If you already know what bash is and have a preferred terminal, you’re welcome to use that instead. Using Git from Git Bash is the recommended option.
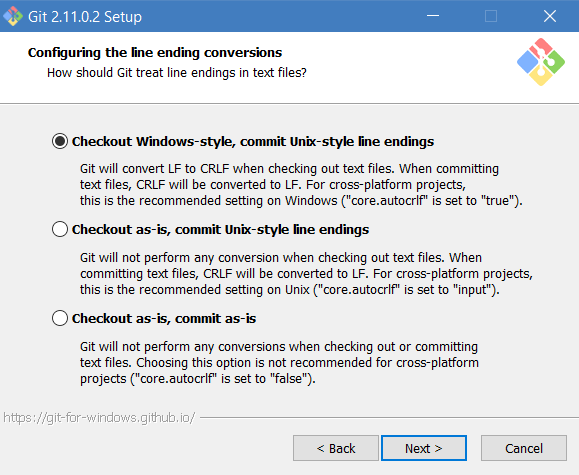
- Windows and Unix based systems use different things to denote line endings in files. Use the recommended option (the first one) to avoid seemingly mysterious bugs down the road.
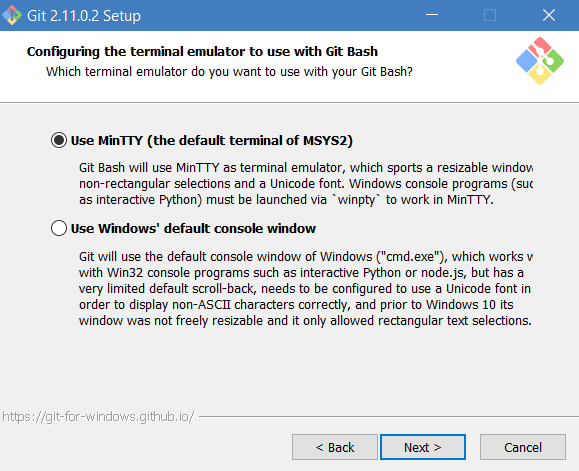
- This option lets you pick between two different “terminal emulators.” This will deeply affect the aesthetics of your working environment. Our official directions assume you choose MinTTY, so if you pick the other option, you’re on your own.
Setup Environment Variables
Lastly, we’ll set up some environment variables. Environment variables are variables available to the operating system. For example, whenever you try to run a program from the terminal, Windows will check the environment variable named PATH, then will look at all folders listed in that variable for the program name, and if it finds that program in any of those places, it’ll run the program. The two environment variables we’ll set are PATH and JAVA_HOME.
Let’s start by seeing why we need to do this. Open up a git bash terminal (using the start menu) and you should see something like this pop up:

This prompt is awaiting our command. If we enter the command javac, we should get “command not found”, as shown below:

If
javacactually works, then somehowjavacis already in your path and you’re done with Windows setup, so you can close this page.
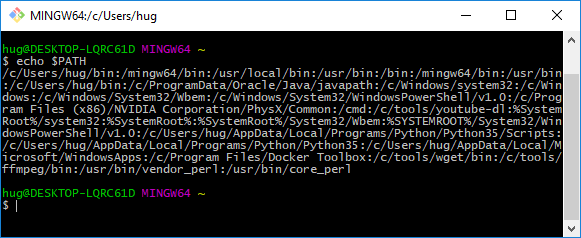
Let’s view the current value of our PATH command line variable. To do this, enter the command echo $PATH. You should see something like the picture below. This is a colon separated list of everywhere Windows looks for programs when we try to run them. For example, when we typed javac, it first looked in /c/Users/hug/bin, then it looked in /mingw64/bin, then /usr/local/bin, all the way until it got to /usr/bin/core_perl. Since it was unable to find Java in any of these locations, it tells us it was unable to find javac.
To fix this, we need to add the location of javac to our path. We’ll do this by first defining a variable called JAVA_HOME, then including a reference to JAVA_HOME in our PATH. We’ll see what we mean by this in the following steps.
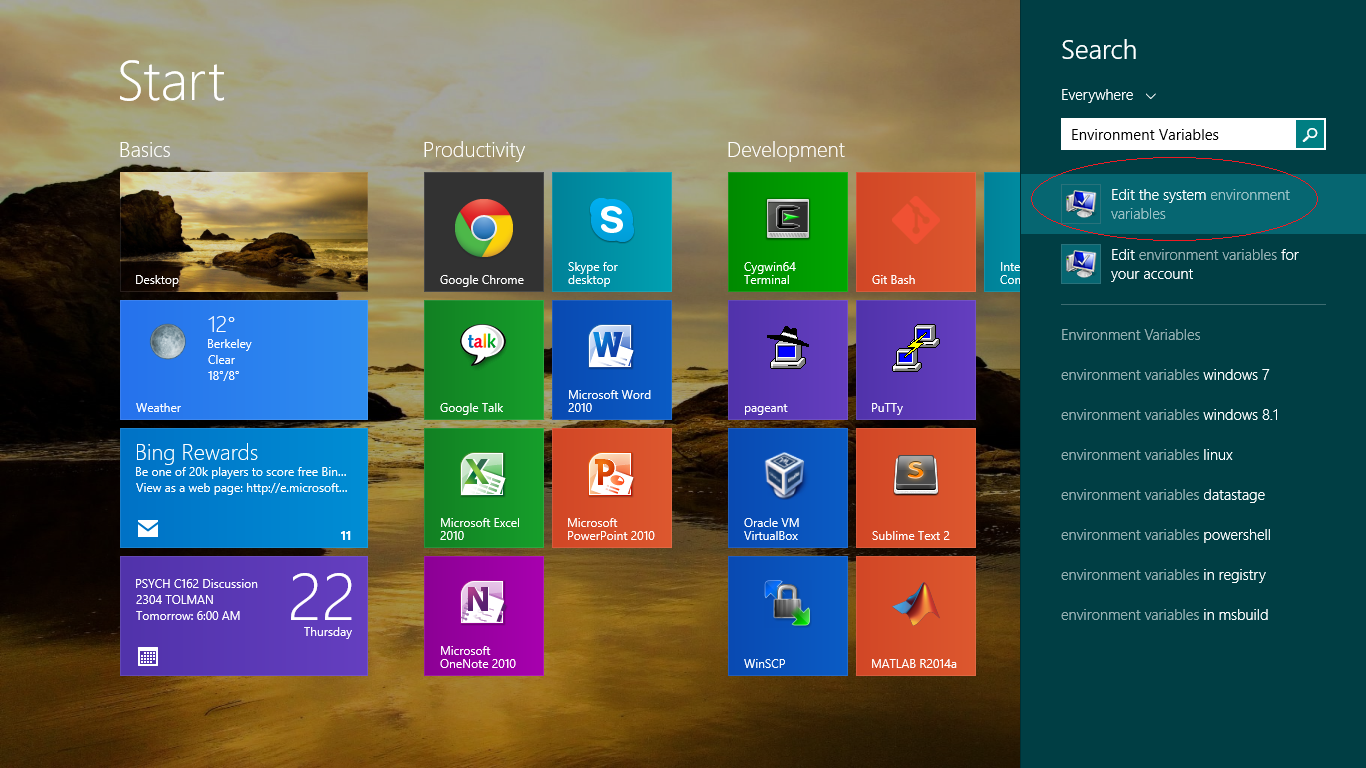
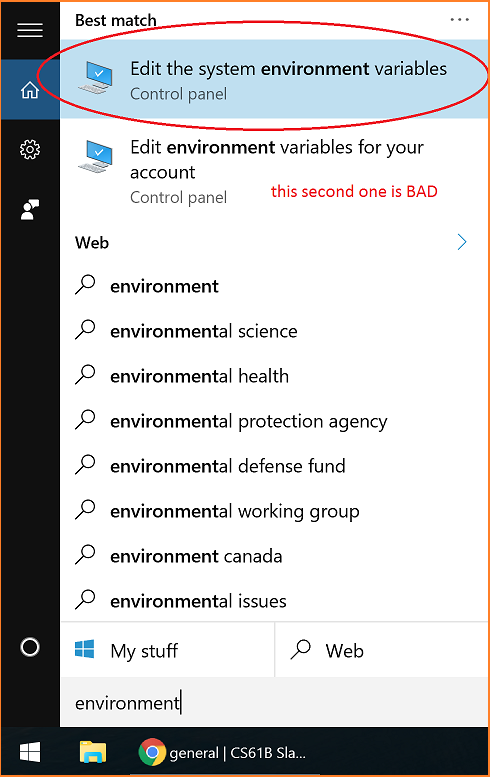
Use Cortana (a.k.a. Windows search) in the bottom left corner of your desktop to search for “environment”. An option should pop up as shown below called “Edit the system environment variables”.
If you’re using an older version of Windows this will look slightly different: Windows 7 Search, Windows 8 Search.
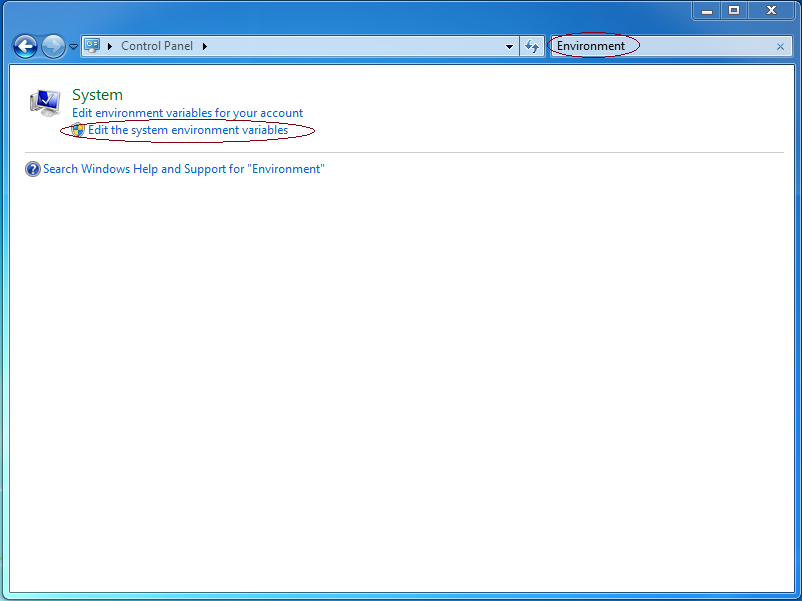
This should bring up something that looks like the picture below, with an “Environment Variables” button you should press.

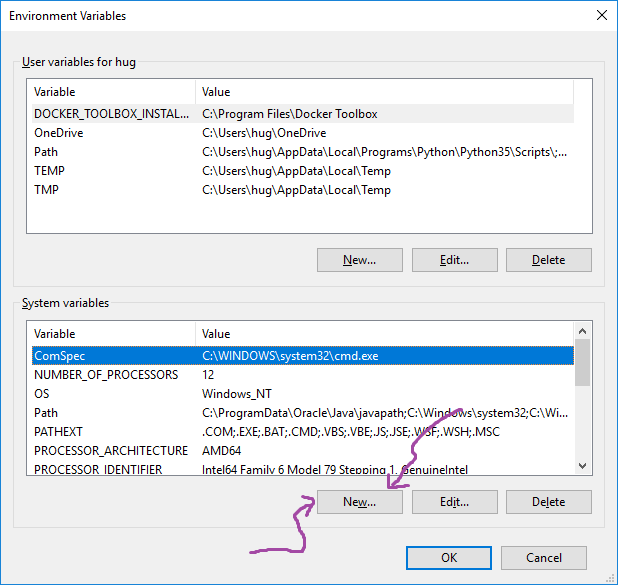
After pressing “Environment Variables”, you should be given a list of environment variables. The picture below is for Windows 10, but Windows 7 and 8 should look similar. Click the “New” button:
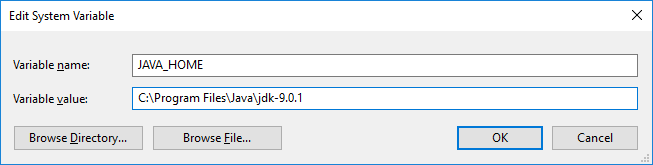
Under “Variable name”, enter “JAVA_HOME” with an underscore. Under “Variable value”, enter the path where you installed the java JDK. On my computer, this is: “C:\Program Files\Java\jdk-10.0.1”. It is important that the directory name contains jdk and not jre (jre does not include javac!). You should end up with something like the following, except with 10.0.1 instead of 9.0.1:
Now scroll down to the existing Path variable in the list. Click on it, then click edit.
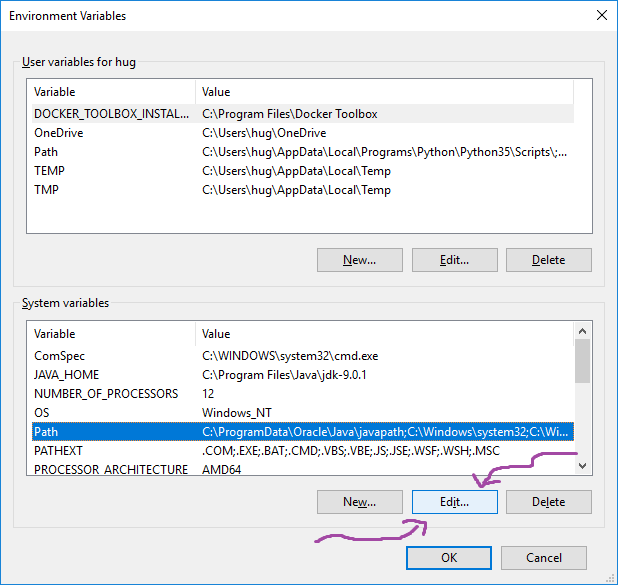
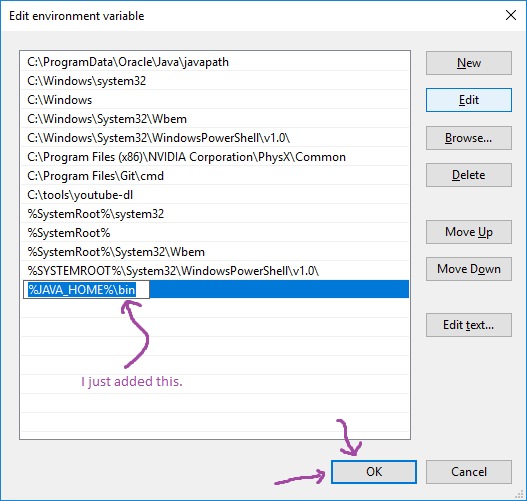
You’ll see all the directories in the path listed. If you’re on an older version of Windows, it’ll be on one big ugly line. In Windows 10, however, it’ll look nice, as shown below. On Windows 10, click “New”, and enter exactly %JAVA_HOME%\bin in the new box. On older versions, add %JAVA_HOME%\bin; (with the trailing semicolon) to the beginning of the line. This tells Windows to look in the subfolder of bin under JAVA_HOME any time you try to run any programs. Then, click OK.
Close all terminal windows. Open a new Git Bash terminal window, and try javac again. This time it should work. If it does not, try printing out your path (using what we did in step 2) above, and confirming that your environment variable was properly set. If you’re still having trouble, post to Piazza.